Short answer: not really. Not if you want the skills to stick.
I've watched too many people breeze through cybersecurity courses, ace the quizzes, then freeze when they need to actually configure a firewall or spot a malware signature in network traffic. Theory without hands-on practice is just expensive entertainment.
That's why I built my first home lab three years ago — initially as a weekend project, now it's where I spend half my learning time. It doesn't have to be expensive or complicated. I'm going to walk you through exactly how I set mine up, what worked, what I'd do differently, and honestly, where I wasted money.
Why a Home Lab Actually Matters (More Than You Think)
Before we get into the setup, let me be clear about why this matters. When you're learning cybersecurity in a vacuum — just reading about attack vectors or watching YouTube walkthroughs — your brain isn't building the same neural pathways as when you're actually configuring systems, breaking things, and fixing them.
A home lab is where you can be genuinely stupid without consequences. Misconfigure a router? Brick a virtual machine? Get ransomware to propagate across your test network? Who cares. That's the entire point. You fail safely, learn the mechanics, and then you don't make those mistakes when it matters.
Plus, employers can tell the difference. Someone who says "I understand firewall rules" is forgettable. Someone who says "I set up pfSense and configured ACLs for network segmentation in my home lab" has actually *done* something. That's the person they're more likely to interview.
The Hardware Question (Spoiler: You Don't Need Much)
This is where I used to overthink. I'd see people talking about rack servers, 64GB RAM, enterprise networking equipment, and I thought you needed to drop ₹2-3 lakhs minimum. You don't.
The Bare Minimum Setup
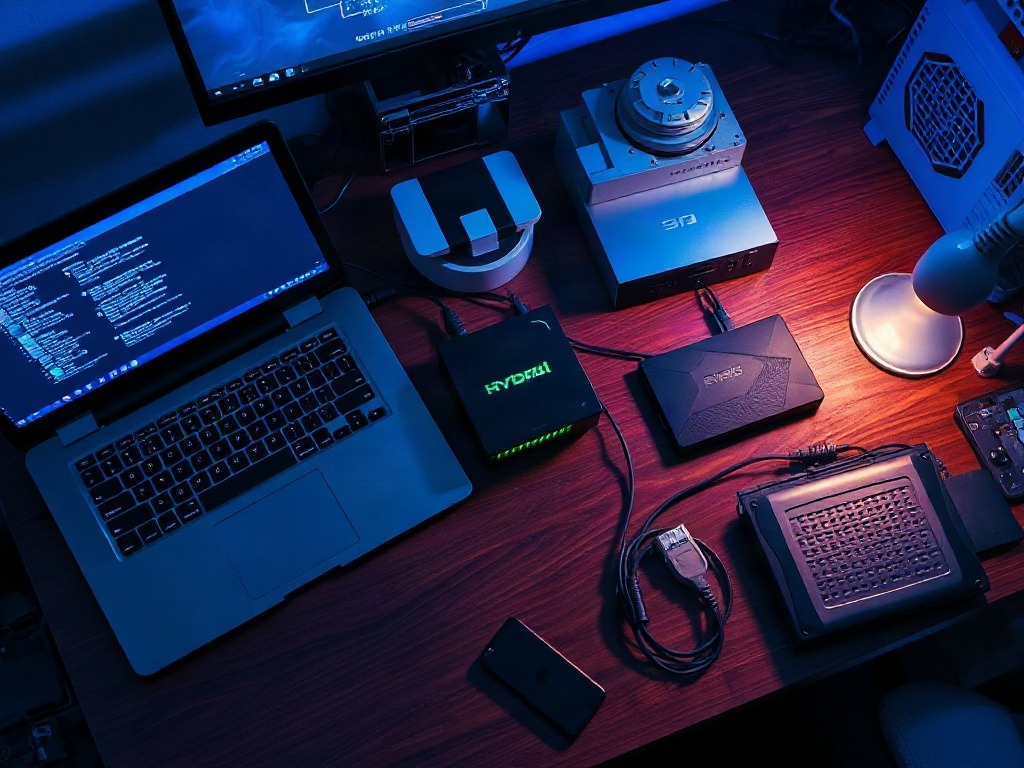
You can start with what you already have. Seriously. I began my first lab on a 2019 MacBook Pro with 16GB RAM and an external SSD. It was tight, but it worked.
For a functional starter lab, you need:
- A main machine: Something with at least 16GB RAM. If you're on 8GB, you're going to hate yourself when you try to run 4-5 virtual machines simultaneously. I could be wrong here, but in my experience, that threshold is real.
- Virtualization software: VirtualBox (free) or Proxmox (free, but steeper learning curve). I used VirtualBox for my first year. It's not flashy, but it gets the job done.
- External storage: A 1-2TB SSD for ISO files, snapshots, and VM backups. I use a Samsung T7 Shield (not sponsored, genuinely reliable for this). Cheap SSDs fail randomly when you're writing to them constantly.
- A second machine (optional but worth it): An old laptop, Raspberry Pi, or even a basic mini PC as a secondary target machine. ₹10,000-15,000 gets you something usable off the secondhand market.
The Mid-Range Setup (If You're Serious)
After six months, I upgraded. Not because I needed to, but because I wanted to simulate more realistic network scenarios.
I picked up a used Ryzen 5 mini PC (₹25,000), repurposed an old router, and set up a separate network segment. This let me simulate multi-machine attacks and defensive scenarios that felt more like actual penetration testing engagements.
Total investment at this level: ₹40,000-60,000 if you're buying secondhand. New equipment would be double that, and honestly, secondhand is fine for learning.
| Setup Level | Hardware | Estimated Cost (INR) | Best For |
|---|---|---|---|
| Starter | Existing laptop + VirtualBox + 1TB SSD | 5,000–15,000 | Learning OS basics, networking fundamentals |
| Mid-Range | Ryzen 5 mini PC + router + 2TB SSD | 40,000–60,000 | Network segmentation, multi-VM scenarios |
| Advanced | Proxmox server + managed switch + VLAN setup | 80,000–1,50,000+ | Realistic enterprise simulation, advanced networking |
Setting Up the Software Stack (My Actual Workflow)
This is where things get concrete. I'll walk you through what I actually installed and why, not just a generic list.
Step 1: Choose Your Hypervisor
I started with VirtualBox because it's free and works everywhere (Windows, Mac, Linux). The interface is intuitive enough that I wasn't spending an hour troubleshooting why my VM wouldn't boot.
Installation: Go to virtualbox.org, download the version for your OS, run the installer. Takes 10 minutes. I'm not going to insult your intelligence with screenshots of clicking "Next."
After learning the basics, I moved to Proxmox (hypervisor software for a dedicated machine). Steeper learning curve, but way more powerful if you're building anything resembling a real infrastructure.
Step 2: Get Your Operating Systems
You need at least three:
- Kali Linux: Your main penetration testing platform. Download from kali.org. It comes with ~600 security tools pre-installed. Honestly, that's bloat if you're learning — you'll use 10 of them. But it's convenient.
- Ubuntu Server: A "victim" machine to practice on. Minimal, realistic, and you'll break it constantly. That's good.
- Windows Server (or Windows 10): Because real networks run Windows, and you need to understand Active Directory attacks. Microsoft gives you 180-day trial VMs free.
Download ISOs to your external SSD. Create snapshots before you start experimenting on anything. Snapshots are your safety net — restore in seconds if something goes sideways.
Step 3: Configure Virtual Networking
This is the part that confused me most initially. VirtualBox's networking options are counterintuitive.
Use this setup:
- Kali (attacker): NAT mode (can access your real network, but isolated)
- Ubuntu Server (target): Internal network called "lab-network" (only Kali can reach it)
- Windows Server: Host-only adapter (you can access it, but it's sandboxed)
This creates a network you can attack without accidentally targeting your real router or printer. I made this mistake once. Never again.
What to Practice First (Realistic Learning Path)
You've got your lab running. Now what? This is where most people flail.
Don't just watch "Ethical Hacking in 30 Days" videos and expect to know what you're doing. Follow a structured path based on what actually matters:
- Week 1-2: Network Reconnaissance. Learn nmap, understand how to map a network. Set up Ubuntu Server, scan it from Kali, learn to read the output. It's boring. It's also foundational.
- Week 3-4: Vulnerability Scanning. Install Nessus (free for home use), OpenVAS, or Qualys. Scan your lab machines, identify vulnerabilities, understand false positives.
- Week 5-6: Exploitation. This is where Metasploit comes in. Pick a known vulnerability, exploit it, see what happens. Break things intentionally.
- Week 7-8: Defensive Measures. Now flip it. Harden Ubuntu. Configure firewalls. Set up intrusion detection (Suricata or Snort). Make it harder for yourself to penetrate.
I used to skip straight to exploitation because it felt more exciting. Mistake. The reconnaissance phase is where real penetration testing happens, and if you can't map a network correctly, you're just noise.
Common Mistakes I Made (So You Don't Have To)
I've been at this long enough to have made all the mistakes twice.
Mistake 1: Not isolating the lab from your main network. I used to connect my lab machines directly to my home WiFi. Then I ran a malware analysis exercise, and suddenly my router was acting weird. Probably coincidence, but I learned the hard way to keep it separate. Use a dedicated network segment if you can, or at minimum, use host-only networking for sensitive experiments.
Mistake 2: Running everything on the same machine. RAM fills up. Performance tanks. You learn nothing because you're staring at a spinning wheel instead of actually analyzing what's happening. Get a second machine, even a cheap one, once you understand your needs.
Mistake 3: Not backing up your lab. I had a drive failure at year two. Lost all my carefully configured machines, all my notes, everything. Now I backup to an external drive and cloud storage (encrypted, obviously). It takes 30 minutes and saves you months of frustration.
Mistake 4: Treating the lab like a game. People download Hack The Box, CTF challenges, and think they're learning penetration testing. You're not. Those are fun, but they're gamified and unrealistic. Your lab should simulate real scenarios — misconfigured services, outdated software, human error. That's where the learning happens.
My Take
Honestly, I'm surprised more people don't do this. Setting up a home lab isn't hard — it's tedious, sure, but not hard. The barrier is mostly psychological. People assume they need expensive equipment or deep technical knowledge upfront.
What actually surprised me was how quickly you start building intuition. After four months of hands-on lab work, network topology made sense in a way that six months of reading never could. I could visualize how packets move, where vulnerabilities hide, why certain configurations matter.
The disappointing part? Most cybersecurity courses still don't require this. You can get certified without ever touching a real system, and employers are starting to realize that certified ≠ capable. A home lab is your proof that you've actually done something.
This is really for people who want to actually *work* in security, not just pass an exam. If you're building a career, this is non-negotiable. If you're curious but casual, you might not need it.
Verdict
Build a home lab. Start with ₹10,000-15,000, spend two weekends getting comfortable, then spend the next few months actually using it. You'll learn more in three months of hands-on work than in a year of coursework.
The hardware doesn't matter as much as consistency. An old laptop with VirtualBox beats an expensive rack server that you're too intimidated to use. Start small, stay disciplined, document your work, and upgrade when you hit actual limitations.
And please, keep it isolated from your main network. Trust me on this one.
Published by Dattatray Dagale • 03 September 2026






0 Comments